Contents
Add Duo's strong two-factor authentication to your web application using an OIDC-compliant authentication protocol to perform two-factor authentication.
Overview
Duo Web SDK is available to paying Duo Premier, Duo Advantage, and Duo Essentials plan customers, Duo Free, and trial accounts. Learn how to sign up for a Duo account and receive a free 30-day Duo Advantage trial.
Implementing Duo two-factor authentication into your site involves splitting your login handler into two parts. You should be familiar with your web application's programming language and authentication process.
For example, a typical single factor login process looks something like this:
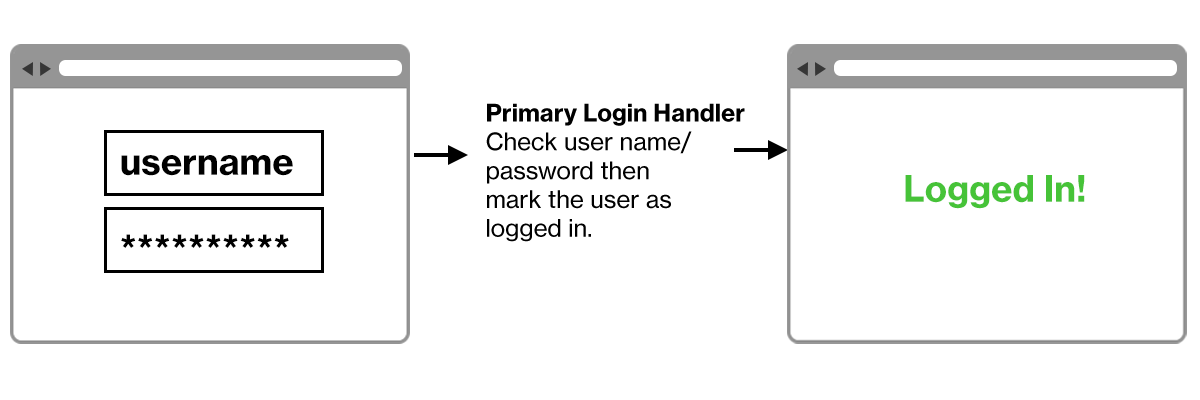
Your application handles primary authentication and provides access to the user when successful.
After adding Duo authentication it will look more like this:

Your application continues to handle primary authentication. After primary authentication success, the user is redirected to Duo for secondary authentication. After receiving and verifying a success response to the redirect from Duo, your application provides access to the user.
Are you a software vendor looking to integrate Duo into your application? Join our free Duo Technology Partner Program for developer accounts, joint marketing support, and more!
Duo Web SDKs
Duo Web SDKs are available on GitHub.
- Python (duo_universal_python)
- Java (duo_universal_java)
- C# (.NET) (duo_universal_csharp)
- Go (duo_universal_golang)
- Node.js (duo_universal_nodejs)
- PHP (duo_universal_php)
To use a different language not available as an SDK or to create your Duo integration without using one of our SDKs, see the OIDC Auth API. Please also contact Duo Support to let us know which additional languages you'd like supported with a Duo Web SDK.
Universal Prompt
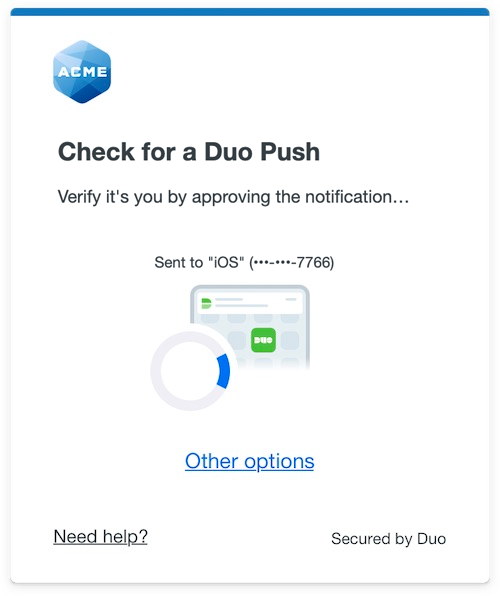
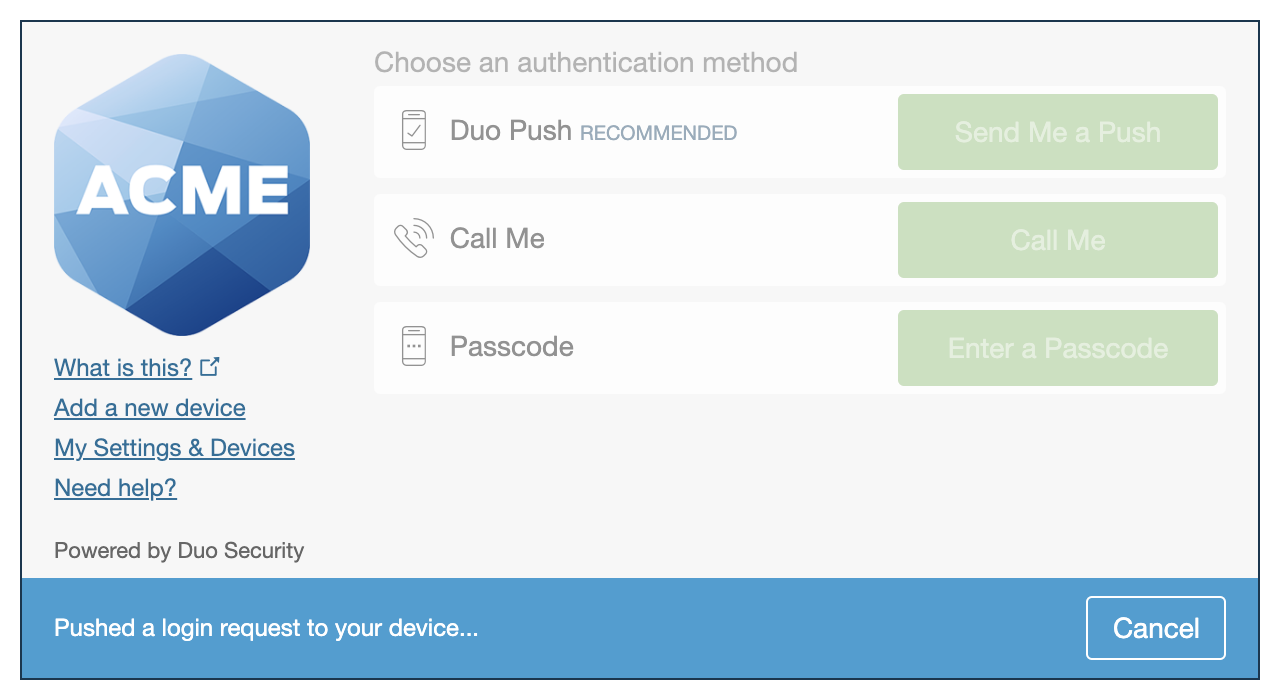
The Duo Universal Prompt provides a simplified and accessible Duo login experience for web-based applications, offering a redesigned visual interface with security and usability enhancements.
| Universal Prompt | Traditional Prompt |
 |
 |
Your complete migration from traditional Duo Prompt to Universal Prompt for your Duo Web application is a three-step process:
-
Update the application to support the Universal Prompt by using the Duo Web SDK v4 with OIDC support.
-
Authenticate with Duo 2FA using the updated application so that Duo makes the Universal Prompt activation setting available in the Admin Panel.
-
From the Duo Admin Panel, enable the Universal Prompt experience for users of that application after the application has been updated with Universal Prompt support.
If you're creating a Duo Web application for the first time, building it with the Duo Web SDK v4 ensures it supports the Universal Prompt.
Duo Prompt UI Support per Delivery Method
| OIDC Redirect (Web SDK v4) | Iframe (Web SDK v2) | |
|---|---|---|
| Duo Universal Prompt | YES | NO |
| Traditional Duo Prompt | YES | YES |
New Web SDK Applications
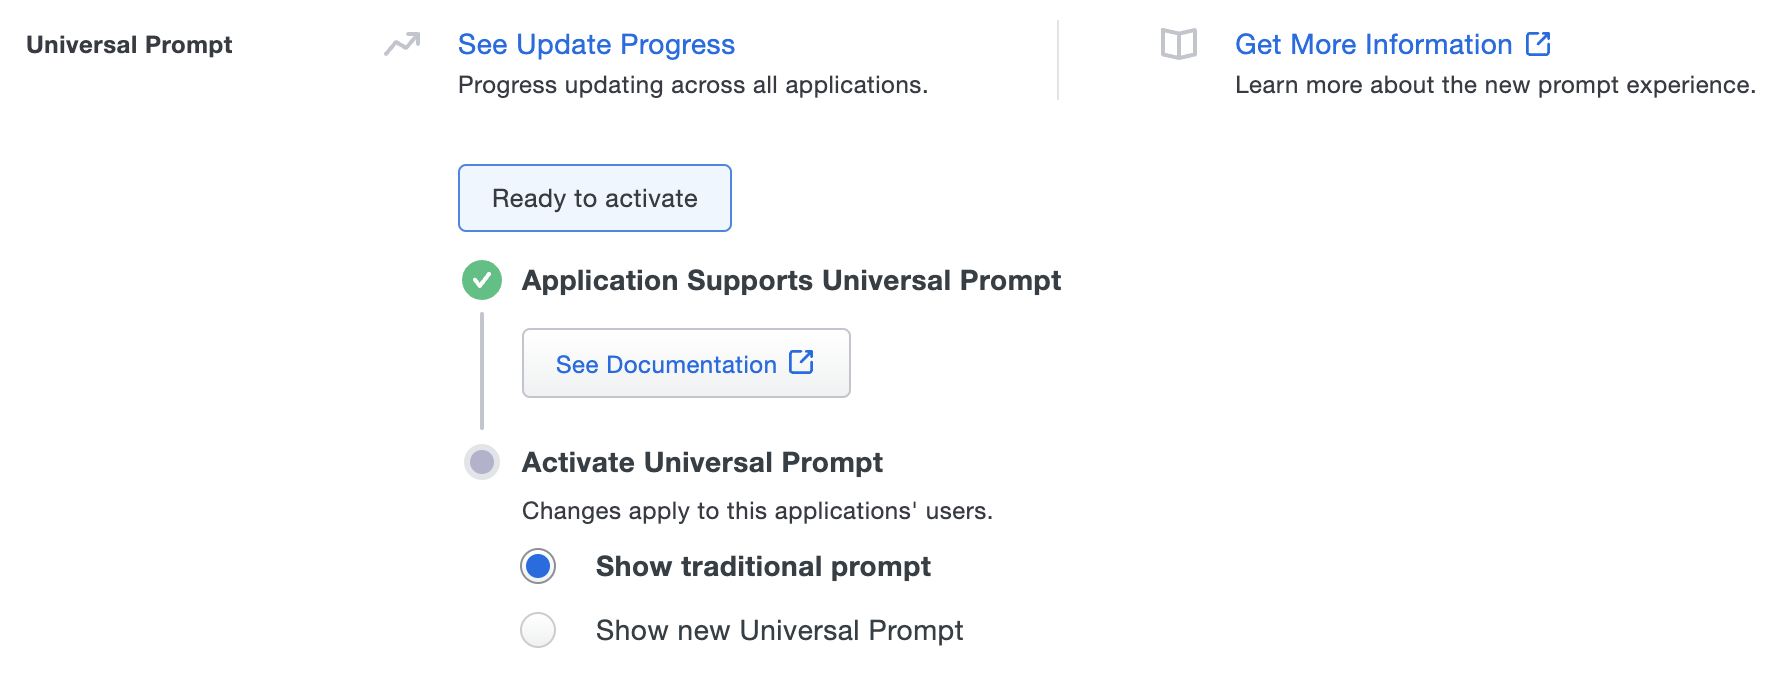
The "Universal Prompt" section on the details page of your new Duo Web SDK application shows the status as "Ready to activate", with these activation control options:
-
Show traditional prompt: Your users experience Duo's traditional prompt when logging in to this application. The traditional Duo Prompt reached its end of support on March 30, 2024.
-
Show new Universal Prompt: (Default) Your users experience the Universal Prompt when logging in to this application.
Existing Web SDK Applications
The "Universal Prompt" section on the details page of your existing Duo Web v2 iframe application will show the status as "Updated required" with a link to update instructions if an application software update is available.
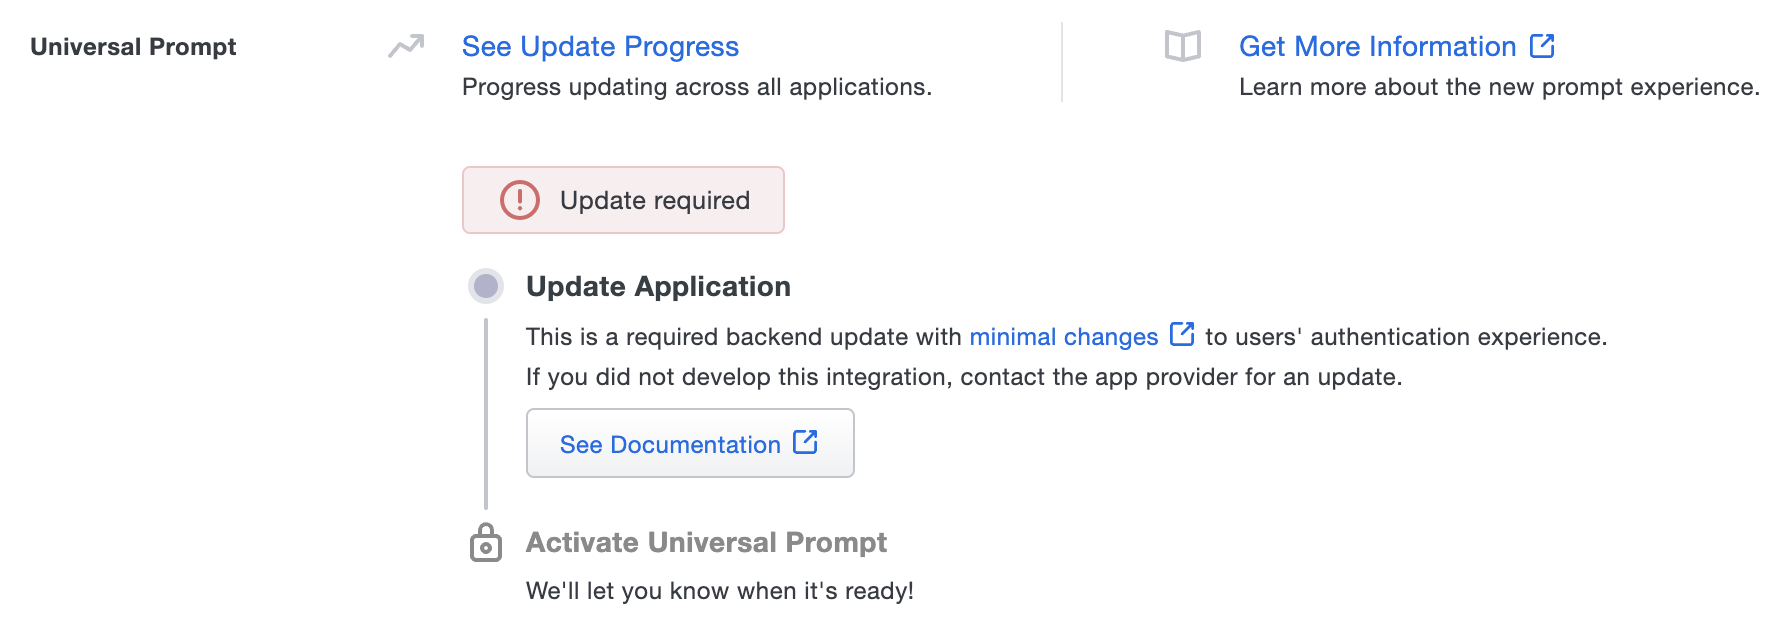
Once you update your Duo integration to use Web SDK v4, and a user authenticates to that existing application via the frameless Duo v4 SDK, the "Universal Prompt" section of the Duo Web application page reflects a status change to "Ready to activate", with these activation control options:
-
Show traditional prompt: (Default) Your users experience Duo's traditional prompt via an iframe when logging in to this application. The traditional Duo Prompt reached its end of support on March 30, 2024, so you should activate Universal Prompt as soon as possible.
-
Show new Universal Prompt: Your users experience the Universal Prompt via redirect when logging in to this application.

In addition, the "Integration key" and "Secret key" property labels for the application update to "Client ID" and "Client secret" respectively. The values for these properties remain the same.
Duo Web SDK and Third-Party Integrations
If you followed a third-party software vendor's Duo configuration instructions to create a Duo Web SDK application for use with their product, please contact that software vendor that to determine availability of the necessary update for frameless Universal Prompt support.
Activate Universal Prompt
Activation of the Universal Prompt is a per-application change. Activating it for one application does not change the login experience for your other Duo applications.
Enable the Universal Prompt experience by selecting Show new Universal Prompt, and then scrolling to the bottom of the page to click Save.
Once you activate the Universal Prompt, the application's Universal Prompt status shows "Activation complete" here and on the Universal Prompt Update Progress report.
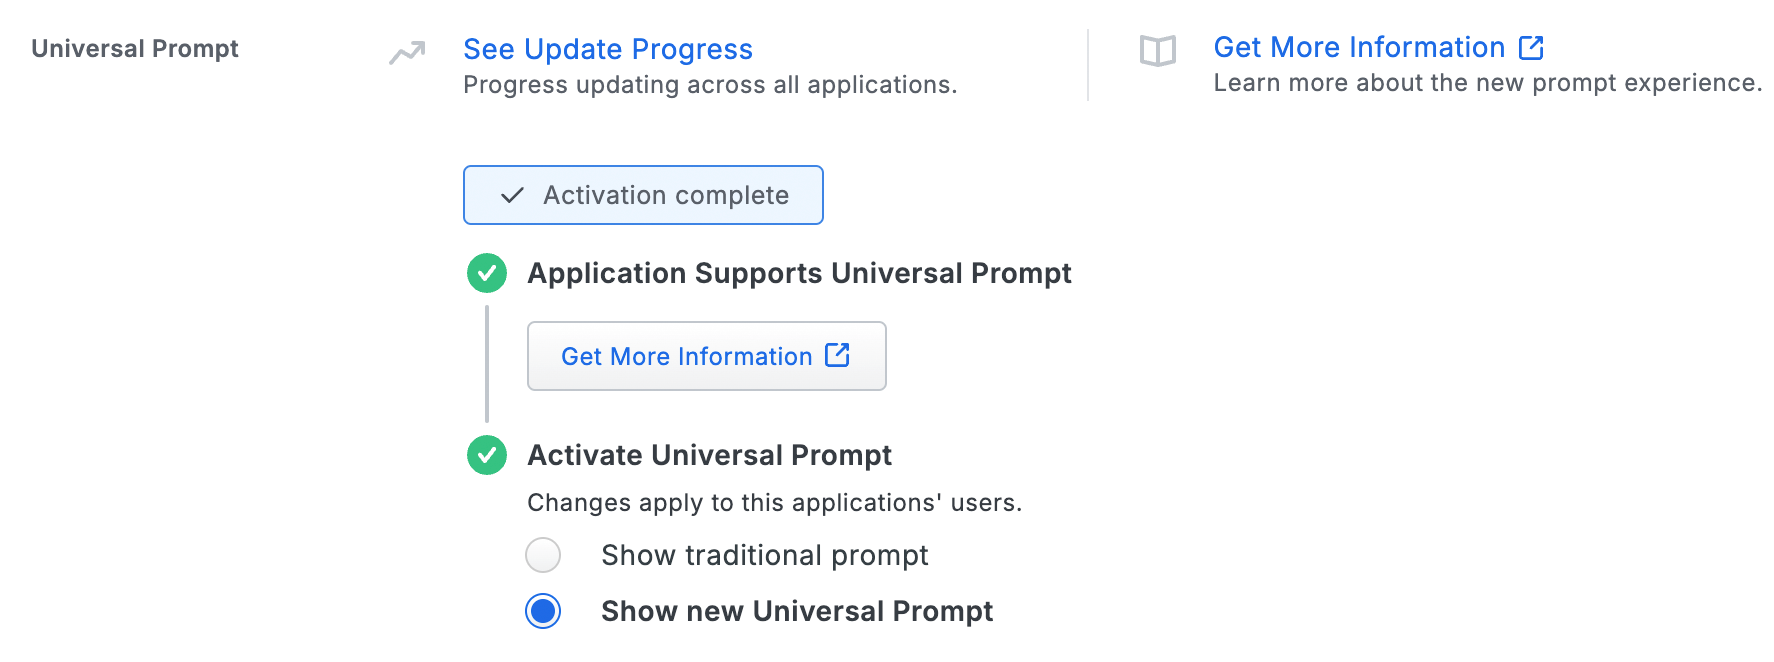
Should you ever want to roll back to the traditional prompt, you can return to this setting and change it back to Show traditional prompt.
Universal Update Progress
Click the See Update Progress link to view the Universal Prompt Update Progress report. This report shows the update availability and migration progress for all your Duo applications that will have Universal Prompt support. You can also activate the new prompt experience for multiple supported applications from the report page instead of visiting the individual details pages for each application.
Watch the Duo Blog for future updates about the Duo Universal Prompt.
Upgrading from Web SDK 2
See the Universal Prompt Update Guide for an overview of the Duo Universal Prompt and its advantages over the previous Web SDK.
The Web SDK 4 Universal Prompt Web SDK is a brand new experience with a substantially different integration flow from the previous Web SDK 2.
Web SDK 4 has some key technical differences from Web SDK 2:
- No longer displays the Duo Prompt in an iFrame on your website. The prompt is now hosted on Duo’s servers and displayed via HTML redirects. It is not possible to embed the v4 prompt in an iFrame.
- No longer requires you to generate and use an
akeyvalue. - Provides a health check to ensure that Duo’s servers are fully up and reachable from the client before attempting the Duo authentication.
- Requires a
client idandclient secretinstead of anikeyandskey(note that these are the same values, relabeled with new names in v4). - When an existing Web SDK v2 application completes its first authentication using Web SDK 4, the corresponding "Web SDK" application in the Duo Admin Panel updates to reflect new v4 terminology and functionality. Web SDK 2 clients continue to function with this Duo application.
- Uses HMAC SHA-512 signing.
If you already have an existing Web SDK application, you do not need to create a new one to migrate it to Web SDK 4. You may reuse that existing integration with your Web SDK v4 updated application.
Note: After upgrading your Application to use Web SDK 4, the Duo Prompt will have identical appearance and functionality as the Web SDK 2 prompt until you activate the Duo Universal Prompt for that application.
Review a step-by-step v2 to v4 example migration using the Python Universal Web SDK on GitHub.
First Steps
To begin development with a new Duo Web SDK integration:
-
Sign up for a Duo account if you aren't already a customer. Your free 30-day Duo Advantage trial includes Web SDK access.
-
Log in to the Duo Admin Panel and navigate to Applications.
-
Click Protect an Application and locate the 2FA-only entry for Web SDK in the applications list. Click Protect to the far-right to configure the application and get your Client ID, Client secret, and API hostname. You'll need this information to complete your setup. See Protecting Applications for more information about protecting applications in Duo and additional application options.
Previously, the Client ID was called the "Integration key" and the Client secret was called the "Secret key".
-
Use NTP to ensure that your server's time is correct.
This application communicates with Duo's service on SSL TCP port 443.
Firewall configurations that restrict outbound access to Duo's service with rules using destination IP addresses or IP address ranges aren't recommended, since these may change over time to maintain our service's high availability. If your organization requires IP-based rules, please review Duo Knowledge Base article 1337.
Effective June 30, 2023, Duo no longer supports TLS 1.0 or 1.1 connections or insecure TLS/SSL cipher suites. See Duo Knowledge Base article 7546 for additional guidance.
Add the duo-universal Dependency to your Project
Client libraries are currently offered for Python, Java, Go, and PHP. To integrate with another language, please see the Duo OIDC-based API documentation.
Python
Issue the following command:
pip install duo_universalRefer to the Duo Universal Prompt Python sample project for a complete example of how to use the SDK.
Java
View the Duo Universal Prompt Java example project for a complete example of how to use the SDK.
Maven
Add the following to the <dependencies> section of your pom.xml:
<dependency>
  <groupId>com.duosecurity</groupId>
  <artifactId>duo-universal-sdk</artifactId>
  <version>1.1.3</version>
</dependency>
Gradle
Add the following to the dependencies section of your build.gradle:
implementation group: "com.duosecurity", name: "duo-universal-sdk", version: "1.1.3"Manual
Find the latest jar on the duo_universal_java GitHub releases page.
Go
To use the SDK in your existing development environment, install it using Go Modules:
go get github.com/duosecurity/duo_universal_golang/duouniversalRefer to the Duo Universal Prompt Go example project for a complete example of how to use the SDK.
PHP
Issue the following command:
composer require duosecurity/duo_universal_phpRefer to the Duo Universal Prompt PHP example project for a complete example of how to use the SDK.
Node.js
To use this client in your existing developing environment, install it from NPM:
npm install @duosecurity/duo_universalRefer to the Duo Universal Prompt Node.js example project for a complete example of how to use the SDK.
C# (.NET)
Include this client in your .NET project from the .NET CLI with:
dotnet add package DuoUniversal --version 1.2.2Or using the NuGet Package Manager with:
Install-Package DuoUniversal -Version 1.2.2Refer to the Duo Universal Prompt C# example project for a complete example of how to use the SDK.
Detailed SDK Workflow
Create a Client() object
After you perform primary authentication (e.g. look up a user's username and password in your database), you should create a Client() object which initializes the secondary authentication process.
Client() takes your Duo Web application's Client ID (or Integration key) as client_id, Client secret (or Secret key) as client_secret, and API hostname as api_host information from the Duo Admin Panel, as well as a redirect uri which Duo will use to redirect back to your application after authentication.
What should I use as the redirect URI?
The redirect URI will be a separate endpoint on your service that listens for the Duo Prompt redirection callback. E.g. if your login form is at https://example.com:8080/login, then your redirect uri could be https://example.com:8080/duo-callback. This URI does not need to be publicly accessible by Duo, it will only be accessed from the end-user’s web browser. Must be a well-formed with a valid HTTPS URL and port, using a hostname (not an IP address), and a maximum length of 1024 characters.
Python Example
import duo_universal
duo_client = duo_universal.Client(client_id, client_secret, api_host, redirect_uri)The security of your Duo application is tied to the security of your client secret (secret key). Treat these pieces of data like a password. They should be stored in a secure manner with limited access, whether that is in a database, a file on disk, or another storage mechanism. Always transfer them via secure channels, and do not send them over unencrypted email, enter them into chat channels, or include them in other communications with Duo.
Call health_check()
A call to health_check() determines if Duo’s servers are accessible and available to accept the 2FA request. If Duo’s servers are inaccessible for any reason (e.g. networking issues, services outage), this method raises an error, and your application can decide how to proceed (i.e. to "Fail Open" and allow the login without completing Duo authentication, or to "Fail Closed" and prohibit the login completely).
Python Example
try:
  duo_client.health_check()
except DuoException:
  # Either allow login without 2FA, or abort the login process
Call generate_state()
generate_state() generates a session identifier. This identifier will be passed to Duo, and should also be stored locally in your code use later to validate Duo's responses. The validation will occur in a different endpoint / web request, so you should store the state in your web framework’s session.
Python Example
state = duo_client.generate_state()
flask.session[‘state’] = state
Call create_auth_url()
create_auth_url() takes the user’s username and the previously generated state and returns a URL to a Duo-hosted endpoint.
Python Example
prompt_uri = duo_client.create_auth_url(username, state)Redirect the Client
Redirect the client web browser to the previously created URI. This is where the end-user is shown the Duo Prompt to complete their authentication. The redirect code is specific to your web framework.
Python Example (Using Flask)
return flask.redirect(prompt_uri)Wait for the Redirect from Duo back to your Redirect URI
After Duo successfully verifies the user — authentication approval via phone call, SMS passcode, Duo Push, etc. or permitted access with bypass of interactive authentication after Duo policy evaluation — their browser is then redirected to the redirect_uri specified earlier in the Client() object. This URI should be an endpoint in your service which completes the remainder of the end-user’s login.
This request includes two GET parameters in the SDK: state and duo_code.
Python Example (Using Flask)
@app.route("/duo-callback")
def duo_callback():
   state = request.args.get('state')
   code = request.args.get('duo_code')
Validate the state Parameter
The state parameter value received from the redirect should be validated against the previously saved state value. If they don't match, this indicates a security issue and the login attempt should be aborted.
Python Example
if state != flask.session['state']:
# Abort login attempt
Call exchange_authorization_code_for_2fa_result()
exchange_authorization_code_for_2fa_result() takes the code parameter from the previous step, as well as the username. This method calls Duo’s service to have your server validate that the user successfully authenticated with Duo.
This method raises a DuoException if the user fails Duo authentication for any reason. If it does not raise an error, then the user has successfully completed Duo authentication. The returned token object contains metadata about the authentication.
Python Example
try:
  decoded_token =
duo_client.exchange_authorization_code_for_2fa_result(code, username)
except DuoException as e:
  # Handle authentication failure.
# User successfully passed Duo authentication.
Troubleshooting
Need some help? Take a look at our Web SDK Knowledge Base articles or Community discussions. For further assistance, contact Support.
